- Home
- Hyper-v EDB Converter
- Guide

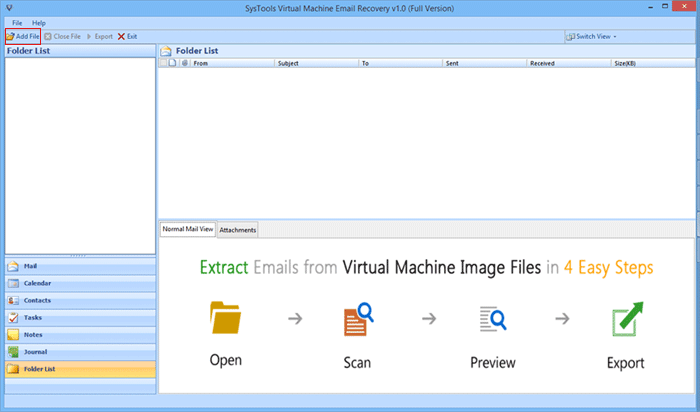
Install, and open the Software. Click on "Add File" button at the top-left side of the home screen.
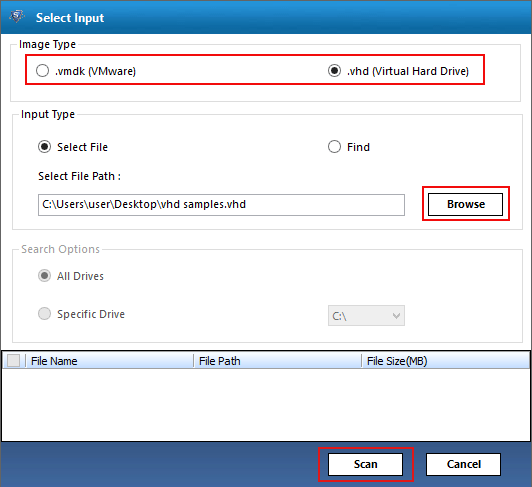
Now software will display "Select Input" option. Choose vmdk (VMware) or .vhd (Hyper-V) Image Type and then "Browse" file. Apply "Find" option to search selected file type from your drive (All Drives or Specific Drive). Then click on "Scan" to start scanning.
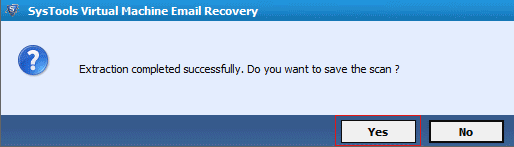
After completed scanning process, you will see the "Extraction Completed" message on your screen. Click "Yes" to save scanned details in .csv or choose "No" then, continue.
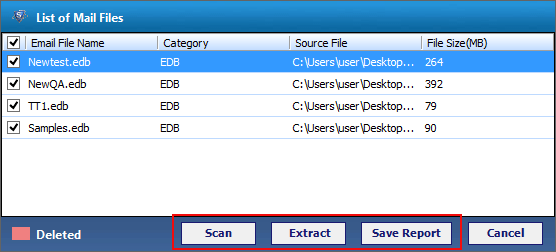
Now, software will display entire list of Mail files. Select all or specific edb files to Scan or for Extraction. If you want to save recovered edb files from VHD or VMDK then, click on "Save Report" button.
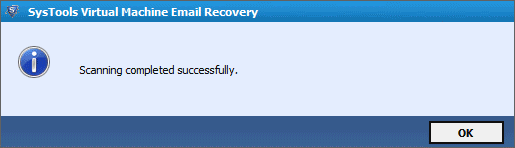
As soon as the scanning process will completed, you will get a pop-up with a message of "Scanning completed successfully".
Tool will show a dialog box when the extraction of selected files will completed.

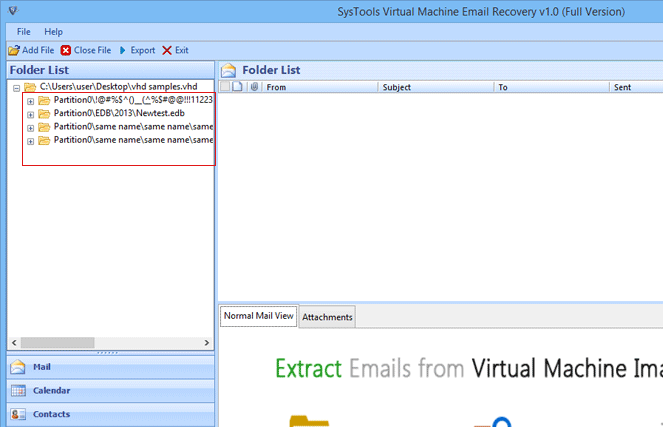
After click on "OK", software will preview all EDB mailboxes in an explorer view on the left-side panel.
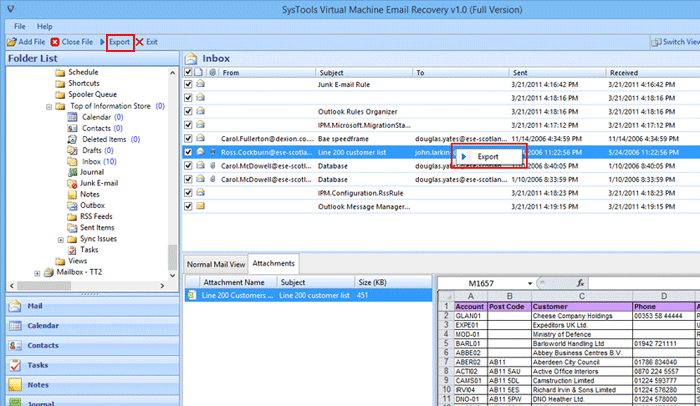
You can see the preview of specific mail with its attachment by clicking on it. Extract and save single or multiple Exchange EDB files on PST via "Export" button or Right click on specific file » Export.
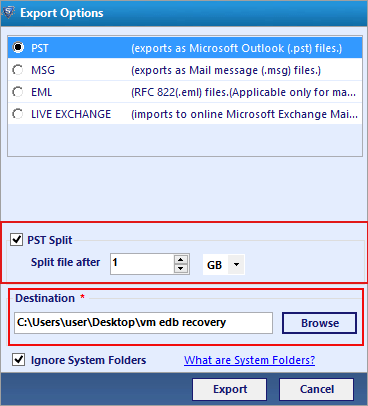
In the Export Option section, Choose any one option to export recovered edb. Click on PST (Microsoft Outlook Personal Storage Table (.pst) Files). To select mailboxes and folders, enable check boxes for them Select Folder (s) section.

Spilt PST Option: The software has option to split large PST file into segments by size parameter. "Browse" destination location where resultant PST files will get saved and hit the Export button.
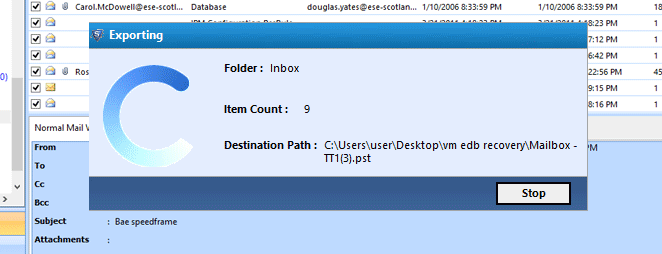
The software will show conversion/exporting process status from a mailbox/public folder details like: Folder name, Item Count, Destination Path.
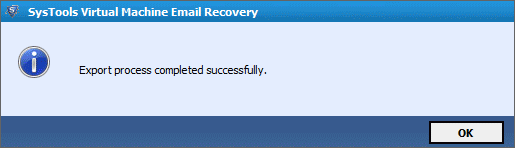
Once the conversion process is complete, a notification about the same will be displayed on screen.
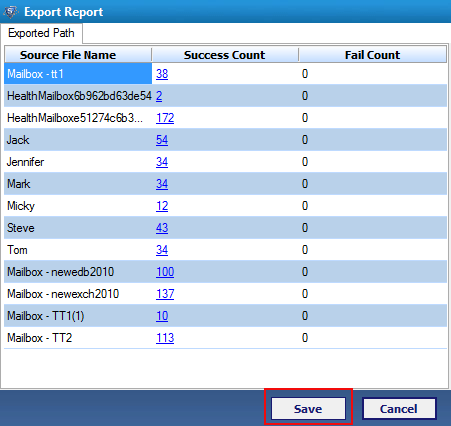
Software will automatically generate an Export Report containing the details of exported mailboxes and the saved location. Click "Save" to get the csv file.
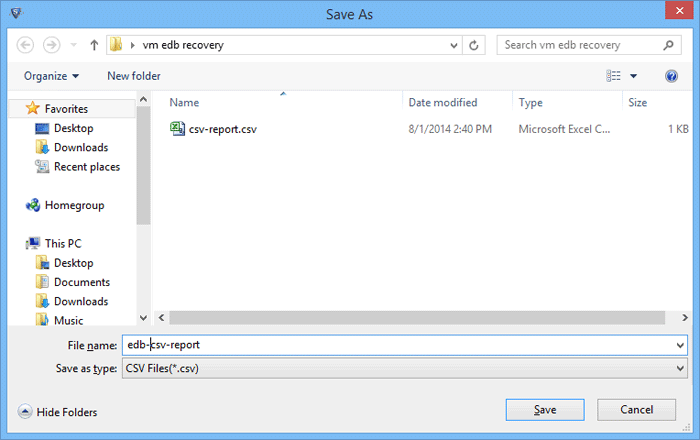
Click on "Save" button to define a path where CSV file has to be saved.
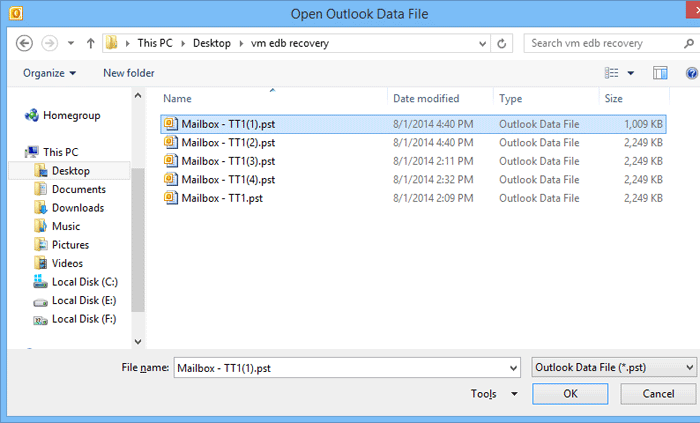
Navigate to the place where you have saved or convert your edb files into pst.
Now, you can view your Exchange edb emails on MS Outlook.
